
Resonance Chain in Plain English
You pulled a character you already own and a strange new item appeared in your inventory. That item is a Waveband, and it feeds directly into one of the most misunderstood progression layers in the game. So, what is Resonance Chain in Wuthering Waves? Here it is in one line:
Resonance Chain is a six-node upgrade path unique to each Resonator, unlocked by collecting Wavebands from duplicate pulls or the in-game shop, that adds passive bonuses or new effects to a character's existing kit.
That is the entire concept. No hidden complexity, no gear farming, no stamina cost. Each node activates once you have the matching Waveband, and the effects range from small stat bumps to meaningful changes in how a skill behaves.
Resonance Chain vs Wavebands and Dupes
A few terms get tangled together in community discussions, so let's separate them quickly:
- Resonance Chain — the upgrade screen itself, containing six sequential nodes per Resonator.
- Waveband — the material required to unlock each node. One Waveband activates one node.
- Duplicate (dupe) — pulling a Resonator you already own on a Convene Banner, which automatically converts into one Waveband for that character.
- Activation — the act of spending a Waveband to turn on the next available node.
Resonance Chain is completely separate from character leveling, weapon upgrades, Forte trees, and Echo loadouts. Those systems use farmable materials you earn through daily play. Resonance Chain, by contrast, relies almost entirely on pulling extra copies or spending a limited currency called Afterglow Coral in the shop.
Why Players Search Resonance Chain Wuwa
Most players land on this topic right after getting their first unexpected dupe. The natural reaction is to wonder whether chasing more copies is worth the Astrite. Here is the honest answer: every Resonator in Wuthering Waves is designed to function at Sequence Node 0, meaning zero chain investment. Nodes can sharpen a character's strengths or add comfort, but they are not a prerequisite for clearing content or building effective teams.
That distinction matters because it shapes every spending decision you will make going forward. Knowing what the wuwa resonance chain actually does, and more importantly what it does not do, keeps you from burning resources on upgrades that sound impressive in a tooltip but barely change your day-to-day experience.
The real question is never whether the system exists. It is whether a specific node, for a specific character, at a specific point in your account, justifies the cost. Answering that starts with understanding why the system was built in the first place.
Why Resonance Chain Matters in Wuthering Waves
Every gacha game needs a reason for veteran players to keep pulling after they already own a character. Resonance Chain fills that role in Wuthering Waves, but it does so with a lighter touch than many players expect. Rather than gating core functionality behind duplicates, the system layers optional depth onto a Resonator's existing kit. Some nodes tighten rotations. Others add survivability or buff uptime. A handful genuinely reshape how a character contributes to a team, like Zhezhi's Sequence Node 2, which increases the max Inklit Spirits summoned by her Resonance Liberation by six, directly boosting her Coordinated Attack output.
Why Resonance Chain Exists
From a design perspective, the system serves three purposes. It gives long-term players a meaningful way to deepen investment in characters they love. It differentiates each Resonator beyond base stats by attaching unique passive effects to their chain. And it creates a natural spending ceiling that separates casual enjoyment from optimization-focused play. None of those goals require you to engage with the system at all if you would rather spend Astrite on new characters instead.
When It Matters for Progression
Importance scales with intent. A player exploring the open world and following the story will rarely feel the absence of chain upgrades. Someone pushing high-difficulty content or refining clear times will notice the difference a well-chosen node makes, especially when it grants interruption immunity during key attacks or feeds extra Concerto Energy into faster swaps. The gap between those two experiences is real, but it is a gap of comfort and efficiency, not of access.
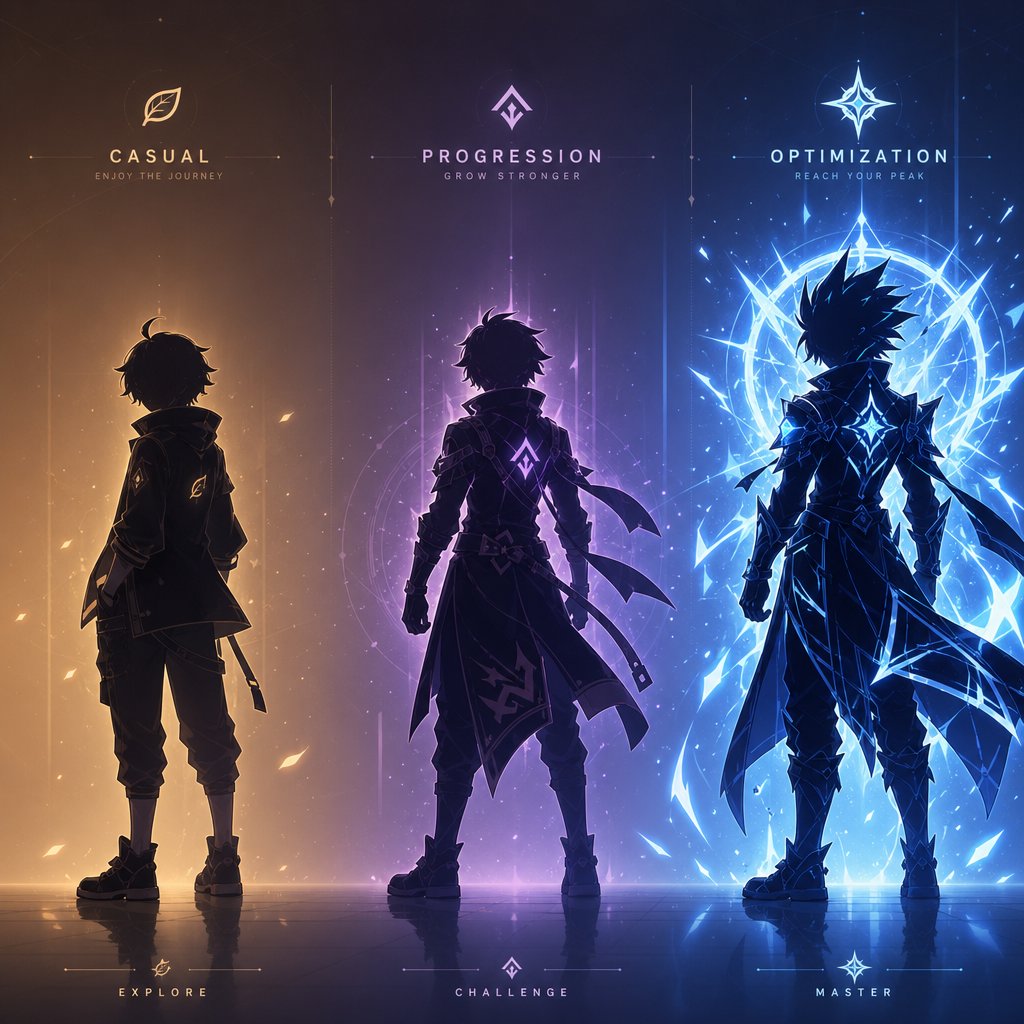
Who Should Care Most About Wuwa Resonance Chain
Not every player needs to think about this system with the same urgency. Your priorities should match your playstyle:
- Casual or story-focused players — Low priority. Base kits handle all overworld and story content comfortably. Astrite is better spent broadening your roster.
- Progression-focused players — Moderate priority. A single early node on a main DPS or key sub-DPS can smooth out rotations and add noticeable damage, like the CRIT DMG boosts on Augusta's or Cartethyia's S1.
- Efficiency chasers and endgame optimizers — High priority, but selective. Targeting specific breakpoints on core roster pieces yields far better returns than spreading duplicates across many characters.
The key takeaway is that why resonance chain matters in Wuwa depends entirely on where you sit on that spectrum. Some chains add a flat stat bump you will never notice in practice. Others, particularly those tied to coordinated attack behavior or Concerto generation, can shift how an entire team rotation flows. Recognizing which category a node falls into before you commit Astrite is the difference between a smart investment and a wasted pity.
That recognition, though, requires knowing exactly how to find and activate these nodes inside the game's menus, a process that trips up more beginners than you might think.
How to Activate Resonance Chain in Wuwa Step by Step
The menus are actually straightforward once you know where to look. The confusion usually comes from not realizing the Waveband is already sitting in your account, waiting to be spent. Here is the full activation flow, start to finish.
How to Activate the Next Resonance Chain Level
Whether you just pulled a duplicate from a Convene Banner or picked up a Waveband through story progression, the steps to activate a new node are identical:
- Obtain a Waveband. This happens automatically when you pull a Resonator you already own — the duplicate converts into one Waveband for that character. For Rover specifically, Wavebands come from main quests, milestones, and Sonance Casket deliveries instead of banner pulls.
- Open the Resonators menu from the main screen. This is your character list.
- Select the Resonator whose Waveband you received.
- Tap the Resonance Chain tab on the left side of the character screen. You will see six nodes arranged in sequence, labeled S1 through S6.
- Select the next available node. The game highlights it automatically if you have the required Waveband.
- Read the node description, then press Activate.
That is it. No additional materials, no Shell Credit cost, no level requirement. One Waveband, one node, instant unlock.
Where to Find the Character Chain Screen
If you are wondering where to find the Resonance Chain screen in Wuthering Waves, it lives inside the same Resonator profile you use for leveling and Forte upgrades. The tab sits alongside options like Weapon, Echo, and Forte on the left navigation panel. It is easy to miss early on because the game does not push you toward it until you actually have a Waveband to spend.
How Wavebands Unlock Resonance Chain Progress
Each Resonator needs six Wavebands total to fully max out their chain from S1 to S6. That means pulling a character seven times — once to obtain them, six more for every node. For the Aero Rover resonance chain, the path is different: Wavebands are earned by completing specific main story chapters rather than pulling on banners, so progression is tied to how far you have advanced in the narrative.
Before you activate any node, a quick gut check saves regret later:
- Does this node increase raw damage numbers, or does it change how a skill actually works?
- Will the effect improve rotation comfort, like faster energy generation or shorter cooldowns?
- Is this character a long-term roster staple, or a temporary fill until a better option arrives?
Activation itself is permanent and instant, so there is no downside to unlocking a node you already have the Waveband for. The real decision happens earlier — at the banner, when you are choosing whether to keep pulling for another copy or save for a different character entirely.
And that decision depends heavily on where those Wavebands actually come from, which varies more than most guides let on.
Where Wavebands and Duplicates Come From
Not every Waveband enters your account the same way. The source depends on the character's rarity, whether they are limited or standard, and whether you are playing as Rover. Piecing this together from scattered tooltips is one of the most common frustrations new players face, so here is every confirmed path in one place.
Where Duplicates and Wavebands Come From
The primary source for most Resonators is simple: pull a character you already own on a Convene Banner, and the duplicate automatically converts into one Waveband. No extra steps, no manual conversion. That single Waveband unlocks one Resonance Chain node.
Beyond banner pulls, the game offers a secondary route through the Afterglow Coral shop. Every time you pull a duplicate Resonator or weapon, you earn Afterglow Coral, a currency you can then spend on specific Wavebands. There are limits, though. Five-star Resonators are capped at two purchasable Wavebands per character, and that stock does not appear to refill. Four-star Resonators can be bought up to the full six needed to max out their chain. During a limited-time Convene Banner, the featured character's Waveband also appears in the shop for the banner's duration, giving you a narrow window to grab an extra copy without relying purely on luck.
Banner Pulls, Shops, Events, and Other Sources

How to Get Aero Rover Resonance Chain Resources
Rover is the outlier that confuses the most people. Unlike every other Resonator, you cannot pull Rover duplicates on banners. Instead, Rover: Aero's Waveband comes from completing quests, hitting account milestones, and opening Sonance Caskets scattered across the world. The wuwa Aero Rover Waveband and the Spectro Rover equivalent each follow their own unlock schedule, and the two forms do not share Wavebands. Unlocking a node for Aero Rover does nothing for Spectro Rover, and vice versa.
Because Rover's acquisition is version-dependent, the number of Wavebands available at any given time changes as new story chapters and events roll out. If you are trying to plan how to get Aero Rover resonance chain progress specifically, check the current version's quest rewards rather than relying on older guides that may reflect a smaller pool of available nodes.
Knowing where every Waveband comes from is half the equation. The other half is understanding what those nodes actually do once activated, because not all chain upgrades carry the same weight in a real team.
When Resonance Chain Changes Team Play
A flat percentage damage increase and a node that reshapes your rotation are two very different things, even if both live on the same chain screen. The distinction matters because one saves you a few seconds on a clear timer while the other can redefine what a character brings to a team.
How Resonance Chain Can Change Team Roles
Some nodes push a Resonator beyond its original job description. Changli's Sequence 4, for example, grants a 20% ATK increase to the entire team after she uses her Intro Skill, lasting 30 seconds. At S0, Changli is a strong sub-DPS who provides Fusion DMG Deepen through her Outro. At S4, she doubles as a team-wide attack buffer every time she swaps in. That is a resonance chain team role change in Wuwa that goes well beyond personal damage — it lifts the ceiling for every other Resonator in the lineup.
Iuno follows a similar pattern from a different angle. Her base kit already blends sub-DPS, shielding, and healing through her Lunar Cycle mechanic. Higher chain levels layer additional buffs and utility onto that foundation, reinforcing her role as a hybrid sustain-and-damage anchor for heavy attack teams. The character does not suddenly become something new — she becomes harder to replace.
Coordinated Attacks Wuwa and Rotation Impact
Coordinated attacks in Wuwa trigger when off-field Resonators contribute damage during the active character's actions. Chain nodes that increase the frequency, hit count, or multiplier of these attacks can meaningfully tighten team synergy. A node that adds extra coordinated attack hits, for instance, feeds more Concerto Energy into the rotation, which speeds up character swaps and shortens the gap between burst windows. The effect compounds across a full fight cycle rather than showing up in a single tooltip number.
Survivability nodes work the same way at a team level. Changli's S1 grants resistance to interruption during her Resonance Skill and enhanced Heavy Attack. On paper, that is a comfort upgrade. In practice, it means she finishes her rotation without getting knocked out of True Sight, which protects the team's overall damage flow and Concerto timing.
When a Chain Upgrade Changes Utility More Than Damage
The table below sorts the most common types of chain effects by what they actually do for your team, not just for the individual character.

Changli's S2 is a clean example of the CRIT Rate category: gaining 25% CRIT Rate from Enflamement stacks means you can shift Echo substats away from crit and toward ATK or Energy Regen without losing consistency. The node's damage contribution is listed at roughly 19%, but the real benefit is the flexibility it hands back to your build.
Reading a chain screen with this framework turns vague percentages into clear decisions. Still, knowing what a node does is only half the puzzle. The harder question is figuring out where to stop investing — which nodes justify the Astrite and which ones are luxury upgrades you can safely skip.
How to Judge Good Resonance Chain Stopping Points
Every chain has six nodes, but almost no one needs all six. The trick is identifying which level delivers enough value to justify the Astrite and which ones cross into diminishing returns. Rather than memorizing tier lists that shift every patch, a simple breakpoint framework lets you evaluate any Resonator on the spot.
How Players Think About Early and Late Breakpoints
Most chain progressions follow a loose three-tier pattern. The first tier is the comfort node — usually S1 — where a small quality-of-life improvement lands, like interruption resistance or a minor energy boost. The second tier is the power spike, often S2 or S3, where a node meaningfully increases damage output or unlocks a new interaction that changes rotation flow. Everything beyond that falls into luxury territory: strong on paper, expensive in practice, and rarely the difference between clearing content or not.
Thinking in those three buckets keeps you grounded. A comfort node is worth grabbing if you already lost the 50/50 and the dupe landed naturally. A power spike is worth planning for if the character anchors your roster. A luxury node is worth chasing only if you genuinely love the character or have no other banner competing for your Astrite.
When to Stop at an Early Resonance Chain Level
Before pulling for another copy, run through this checklist:
- Does the next node change how the character plays, or does it just inflate a multiplier you will barely notice?
- Is this Resonator a core part of your endgame team, or a situational pick you rotate in occasionally?
- Would the same Astrite give you more account value spent on a new character or weapon banner instead?
- Are you pulling because the node genuinely improves your experience, or because the number looks impressive in a tooltip?
- Does the node benefit the whole team — through buffs, energy generation, or role compression — or only the individual character?
If more than two answers lean toward "skip," your Astrite is better saved. One strong S1 on a character you play every day outweighs an S3 on someone collecting dust.
How to Judge Cartethyia, Carlotta, Iuno, and Augusta Chains
Applying the framework to specific Resonators shows how differently each chain plays out. The Iuno resonance chain is a good case study because game8's breakdown rates her S1 as a solid comfort upgrade — ATK increase during Lunar Cycle, energy regeneration inside Full Moon Domain, and interruption resistance on key skills. Her S2 is the real spike: Resonators with 10 stacks of Blessing of the Wan Light gain an additional 40% All DMG Amplification. That is a massive team-wide buff, but it only reaches full potential if your main DPS can generate 10 shields in one rotation, which currently means pairing her with Augusta. If you run Iuno without Augusta, stopping at S1 is perfectly reasonable.
The Augusta resonance chain follows a similar logic in reverse. Her early nodes strengthen personal damage and shield generation, reinforcing the exact mechanic that makes Iuno's S2 shine. Investing in Augusta's chain pays dividends across the duo, not just on her own stat sheet.
For the Carlotta resonance chain, the evaluation shifts toward personal DPS value. Carlotta operates as a Glacio main damage dealer, so her breakpoints hinge on whether a node boosts her burst window or just pads sustained numbers she already handles well at S0. The Cartethyia resonance chain follows a comparable pattern — check whether the node expands what the character can do in a team or simply makes existing numbers larger. A node that enables role compression or smooths out Concerto timing is almost always worth more than a flat multiplier increase of the same percentage.
No single stopping point is correct for every player. Someone building around an Iuno-Augusta core has a clear reason to push S2 on Iuno. Someone running Carlotta in a different composition might find S1 sufficient and redirect resources elsewhere. The framework stays the same; only the inputs change.
Even with a solid evaluation method, though, the system still trips people up in ways that have nothing to do with math — and those mistakes are worth addressing before they cost you a pity.
Common Resonance Chain Mistakes Wuwa Beginners Should Avoid
Half the stress around this system comes from misunderstandings, not actual complexity. The mechanics are simple once you strip away the assumptions players carry in from other gacha games or pick up from outdated guides. Here are the patterns that cause the most confusion.
Common Resonance Chain Mistakes Beginners Make
- Thinking a duplicate is the same as activation. Pulling a dupe gives you a Waveband. That Waveband still needs to be manually activated in the Resonance Chain tab. Plenty of players sit on unspent Wavebands for weeks without realizing it.
- Assuming every 5-star needs chain investment to work. Every Resonator ships complete at S0. Chain nodes add polish, not core functionality. Skipping them entirely does not lock you out of any content.
- Spreading dupes across too many characters. One S2 on a character you play daily is worth far more than three scattered S1 nodes on units you barely touch. Focus beats breadth here.
- Ignoring the Afterglow Coral shop. Some players forget they can buy Wavebands with Afterglow Coral earned from duplicate pulls. It is a free extra node if you check the shop regularly.
- Reading chain descriptions out of context. A 15% damage multiplier sounds huge in isolation. Measured against your full rotation output, it might translate to a 2-3% total DPS gain. Always evaluate nodes relative to the whole kit, not the tooltip alone.
Aero Rover Resonance Chain and Spectro Rover Wavebands Confusion
This one deserves its own callout because it catches almost everyone. Rover exists in multiple elemental forms — Spectro, Havoc, and Aero — and each form has its own independent Resonance Chain with its own Wavebands. Spectro Rover Wavebands do absolutely nothing for Aero Rover, and vice versa. They are treated as separate characters under the hood, even though they share the same body and name.
The Aero Rover resonance chain confusion gets worse because acquisition works differently from every other Resonator. You cannot pull Rover dupes on banners. Rover Wavebands come from story quests, milestones, and Sonance Caskets, and the available count changes with each game version. As of the current patch, Aero Rover can reach up to S4, not S6. If a guide tells you to max out Aero Rover's chain right now, it is either outdated or wrong.
How to Read Any Wuwa Resonance Chain Page
When you open a character's chain screen, focus on three things before anything else. First, check whether the node adds a new mechanic or just scales an existing number. Second, look at the condition — does the effect trigger automatically, or does it require a specific combo or team setup? Third, ask whether the benefit stays with the character or extends to the whole party. Nodes that buff teammates or generate shared resources like Concerto Energy tend to punch above their weight compared to personal stat increases of similar size.
A Resonator at S0 with good Echoes, a leveled weapon, and a maxed Forte tree will outperform an S3 character with neglected fundamentals every single time.
Getting the basics right matters more than any chain node ever will. Once those fundamentals are solid and the common mistakes are out of the way, the only question left is how to plan your pulls so the right Wavebands land at the right time.
Smart Next Steps for Pull Planning
Knowing the system inside out only matters if it changes how you spend. Every banner is a fork in the road — chase another copy or save for someone new — and the answer is never the same twice. Here is how to plan pulls for resonance chain goals in Wuwa without second-guessing yourself at pity.
How to Plan Pulls Around Resonance Chain Goals
Before you tap that Convene button, run through this checklist honestly:
- Is this character a genuine favorite you will use for months, or a pull driven by hype that fades in two weeks?
- Does the next chain node change gameplay — rotation flow, team buffs, role compression — or just pad a multiplier?
- Would a signature weapon give you a bigger upgrade at lower cost? Community testing consistently shows a sig weapon adds roughly 25% improvement for a fraction of what chasing RC6 demands.
- Are there upcoming banners in the next phase that fill a bigger roster gap than one extra dupe would?
- What does your pity look like right now? Pulling without checking your 50/50 history is the fastest way to waste Astrite on an off-banner you did not want.
If you are sitting on 160 pulls or more, you have room to chase a meaningful breakpoint like S1 or S2 on a core unit. Below that threshold, securing a new Resonator almost always delivers more account value than one incremental node. Should you chase resonance chain in Wuthering Waves? Only when the math and the motivation both line up.
When Optional Lunite Top-Ups Make Sense
Some players reach a point where they are a handful of pulls short of a guaranteed pity on a character they have already committed to. That is the one scenario where wuwa Lunite top-up planning becomes a practical conversation rather than an impulse. If you decide to top up, do it with a clear target — not an open-ended "let's see what happens" mindset.
Useful Wuthering Waves Progression Resources
Pulling smarter starts with staying informed. These resources help you track banners, compare breakpoints, and manage your account efficiently:
- VeloxGame Wuthering Waves Global Top-Up — an optional top-up platform for active players exploring progression and monetization options alongside core gameplay systems like co-op and crossplay.
- Wuthering Waves Priority Guide — a beginner-friendly breakdown of what to focus on at each Union Level.
- In-game Resonance Chain tab — always read the actual node description before pulling. Tooltips beat secondhand summaries.
The entire point of understanding this system is freedom. When you know exactly what each node does, where Wavebands come from, and which breakpoints justify the cost, no banner can pressure you into a bad decision. Pull with a plan, stop with confidence, and spend your Astrite where it actually moves the needle.
Resonance Chain Wuthering Waves FAQ
1. How many duplicates do you need to max out a Resonance Chain in Wuthering Waves?
You need six Wavebands to fully unlock all nodes from S1 through S6, which means pulling the same Resonator seven times total — once to obtain them and six additional copies that each convert into one Waveband. For five-star characters, the Afterglow Coral shop lets you purchase up to two extra Wavebands, potentially reducing the number of banner pulls required. Rover is the exception since Wavebands come from story quests and milestones rather than banner pulls.
2. Is Resonance Chain necessary to clear endgame content in Wuthering Waves?
No. Every Resonator in Wuthering Waves is designed to function at Sequence Node 0 with zero chain investment. Properly leveled weapons, maxed Forte trees, and well-built Echo loadouts contribute far more to combat performance than chain nodes do. Resonance Chain adds comfort, efficiency, and occasional playstyle shifts, but it never gates access to any content. Players who invest in fundamentals first will consistently outperform accounts that chase chain levels while neglecting base progression systems.
3. How do you get Aero Rover Wavebands in Wuthering Waves?
Unlike standard Resonators, Rover cannot be pulled as a duplicate on Convene Banners. Aero Rover Wavebands are earned through main story quest completions, account milestones, and Sonance Casket deliveries found across the open world. The total number of available Wavebands increases with each game version as new story chapters release. Aero and Spectro Rover have completely separate Waveband pools, so progress on one form does not carry over to the other.
4. What is the difference between a Waveband and a duplicate in Wuthering Waves?
A duplicate is what happens when you pull a Resonator you already own on a Convene Banner. That duplicate automatically converts into a Waveband, which is the actual material used to activate a Resonance Chain node. Think of the duplicate as the trigger and the Waveband as the currency. You can also acquire Wavebands without pulling duplicates by spending Afterglow Coral in the in-game shop, though stock limits apply depending on the character's rarity.
5. Should you pull for Resonance Chain or a signature weapon first in Wuthering Waves?
In most cases, a signature weapon delivers a larger performance boost at a lower Astrite cost than chasing multiple chain nodes. Community testing generally places a signature weapon around a 25% improvement over four-star alternatives, which often rivals or exceeds the cumulative gain from S1 and S2 combined. The exception is when a specific early chain node fundamentally changes rotation flow or adds a team-wide buff that no weapon can replicate. Evaluating the specific node effect against the weapon's stat gain for your main roster is the most reliable way to decide. For players exploring top-up options to reach a specific pity target, platforms like VELOX's Wuthering Waves Global Top-Up at veloxgame.com offer a streamlined way to secure Lunites.


